Install the Neon Postgres Previews Integration on Vercel
Create a database branch for each preview deployment in Vercel
What you will learn:
What is the Neon Postgres Previews Integration
How to install the integration
How to manage your integration
About the integration
- The Neon Postgres Previews Integration connects your Vercel project to your Neon database and automatically creates a Neon database branch for each Vercel preview deployment.
- The integration is intended for users who have registered with Neon directly.
- It's installed from the Vercel Marketplace as a third-party Connectable Account integration.
Why create a database branch with each preview deployment?
Vercel preview deployments enable teams to collaborate effectively by automatically creating an isolated, production-like environment for every commit. This allows changes to be previewed before they are merged into production.
However, when databases are involved, teams often use a single database containing dummy data for all preview deployments. This setup is not ideal for these reasons:
- If the shared database encounters an issue, so will all preview deployments.
- Changes to the shared database schema might break all previously created preview deployments, making it a productivity bottleneck.
Neon’s database branching feature addresses these challenges. A branch is an isolated clone of your database, so creating it only takes a few seconds. This makes it an effective solution for preview deployments, enabling you to create a full database copy for each pull request that includes your database schema changes, which you can apply automatically by adding migrate command to your Vercel deployment configuration.
When you push changes to your application repository, triggering a preview deployment in Vercel, the integration automatically creates a database branch in Neon and connects it to your preview deployment by setting Vercel preview environment variables.
Postgres Previews video introduction
For a video introduction to the integration, see Video: A Postgres database for Every Preview Deployment.
Prerequisites
- A Vercel account.
- A Vercel project. If you do not have one, see Creating a project, in the Vercel documentation.
note
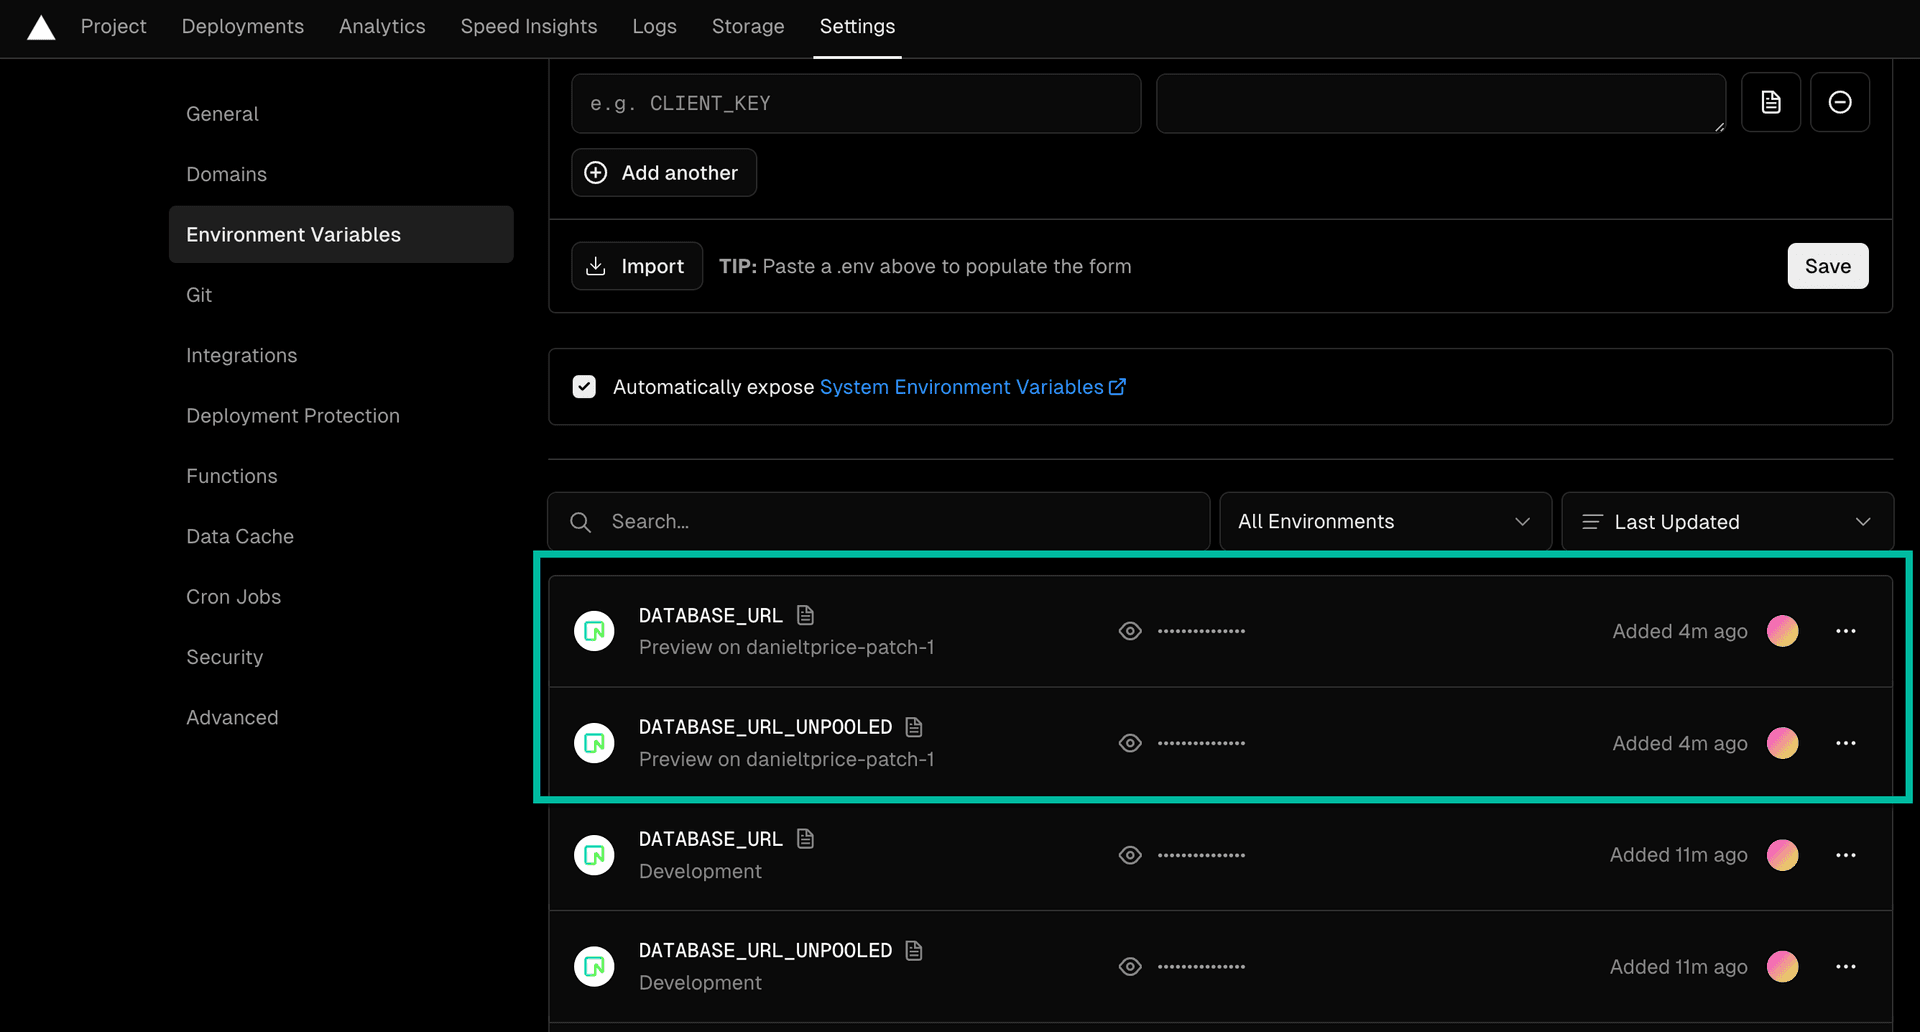
The integration initially sets the DATABASE_URL and DATABASE_URL_UNPOOLEDenvironment variables for your Vercel Production and Development environments. When you create a preview deployment, the integration will also set these variables for your Preview environment. To use different Postgres variables with the Neon integration, see Configure Vercel environment variables.
How to install
This section describes how to add the Neon Postgres Previews Integration to your Vercel project. The integration is supported with GitHub, GitLab, and Bitbucket source code repositories.
important
- The Neon Postgres Previews Integration can be used with more than one Vercel project, but it can only connect one Vercel project to one Neon project. It does not support connecting multiple Vercel projects to one Neon project or connecting multiple Neon projects to one Vercel project.
- If you connect another Vercel project to the same Neon project, the integration will overwrite the settings configured in Neon for the current Vercel project.
- The integration cannot be used together with the with the Neon Postgres Native Integration in the same Vercel project.
To add the integration:
-
In the Neon Console, select Integrations from the sidebar.
-
Find the Vercel integration and click Add.
-
From the Vercel integration drawer, click Add from Vercel.
note
You can also access the integration directly from the Vercel Marketplace or the Integrations Console on your Vercel Dashboard.
-
Click Install.
-
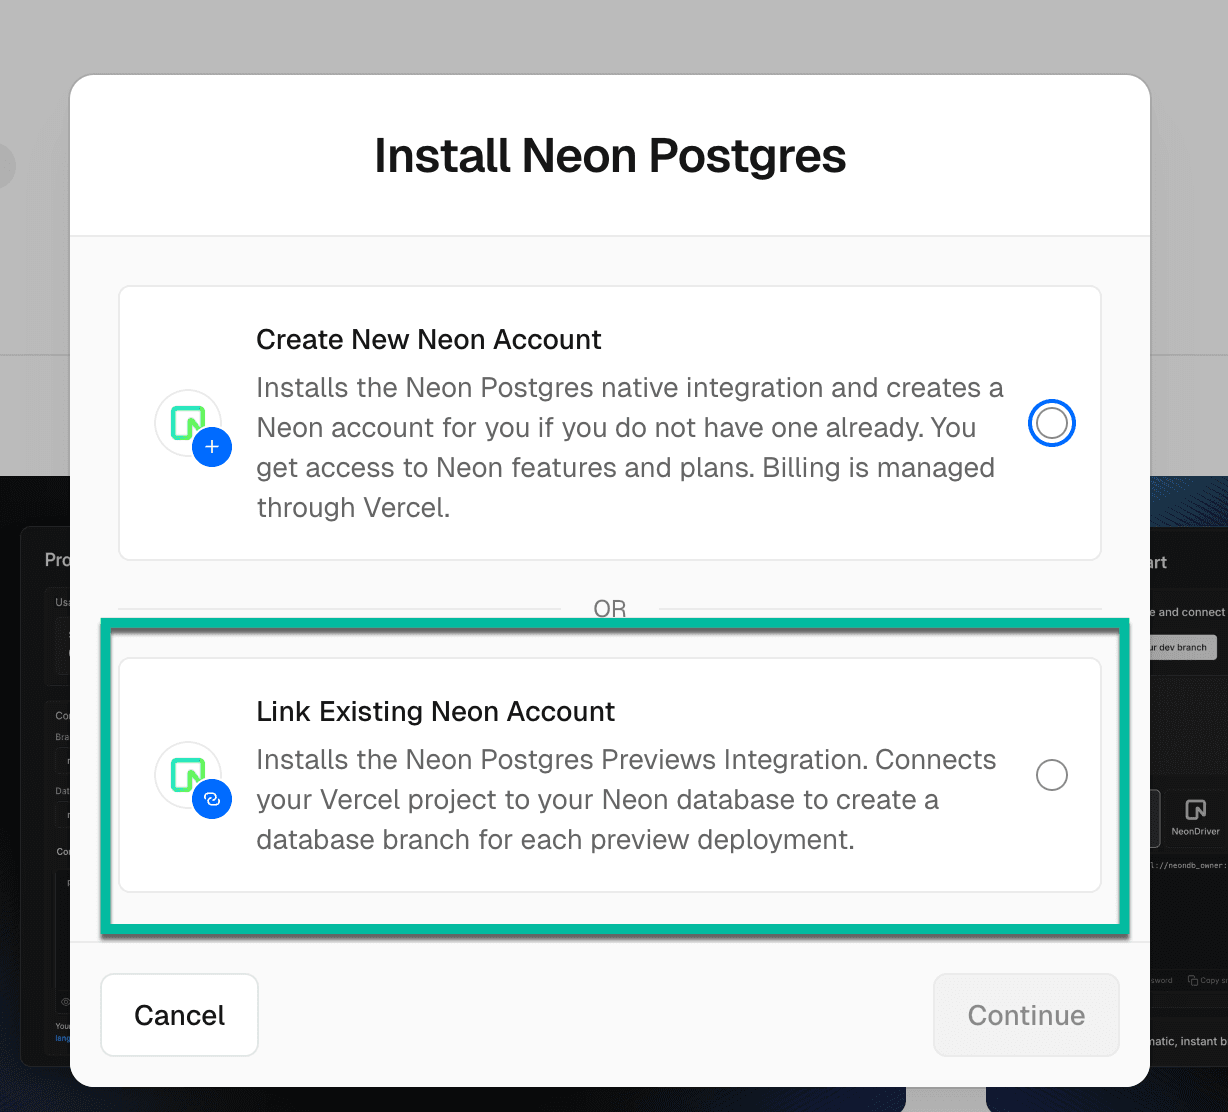
On the Install Neon Postgres modal, you are presented with two options. Select Link Existing Neon Account, and click Continue.
-
Select a Vercel Account to add the integration to.
-
Select the Vercel projects to add the integration to. You can select All Projects or Specific Projects but be aware that you can only connect one Vercel project to one Neon project and vice versa. By selecting All projects, you are simply making the integration available to other Vercel projects.
-
Review the permissions required by the integration, and click Install.
-
In the Integrate Neon dialog:
- Select a Vercel project.
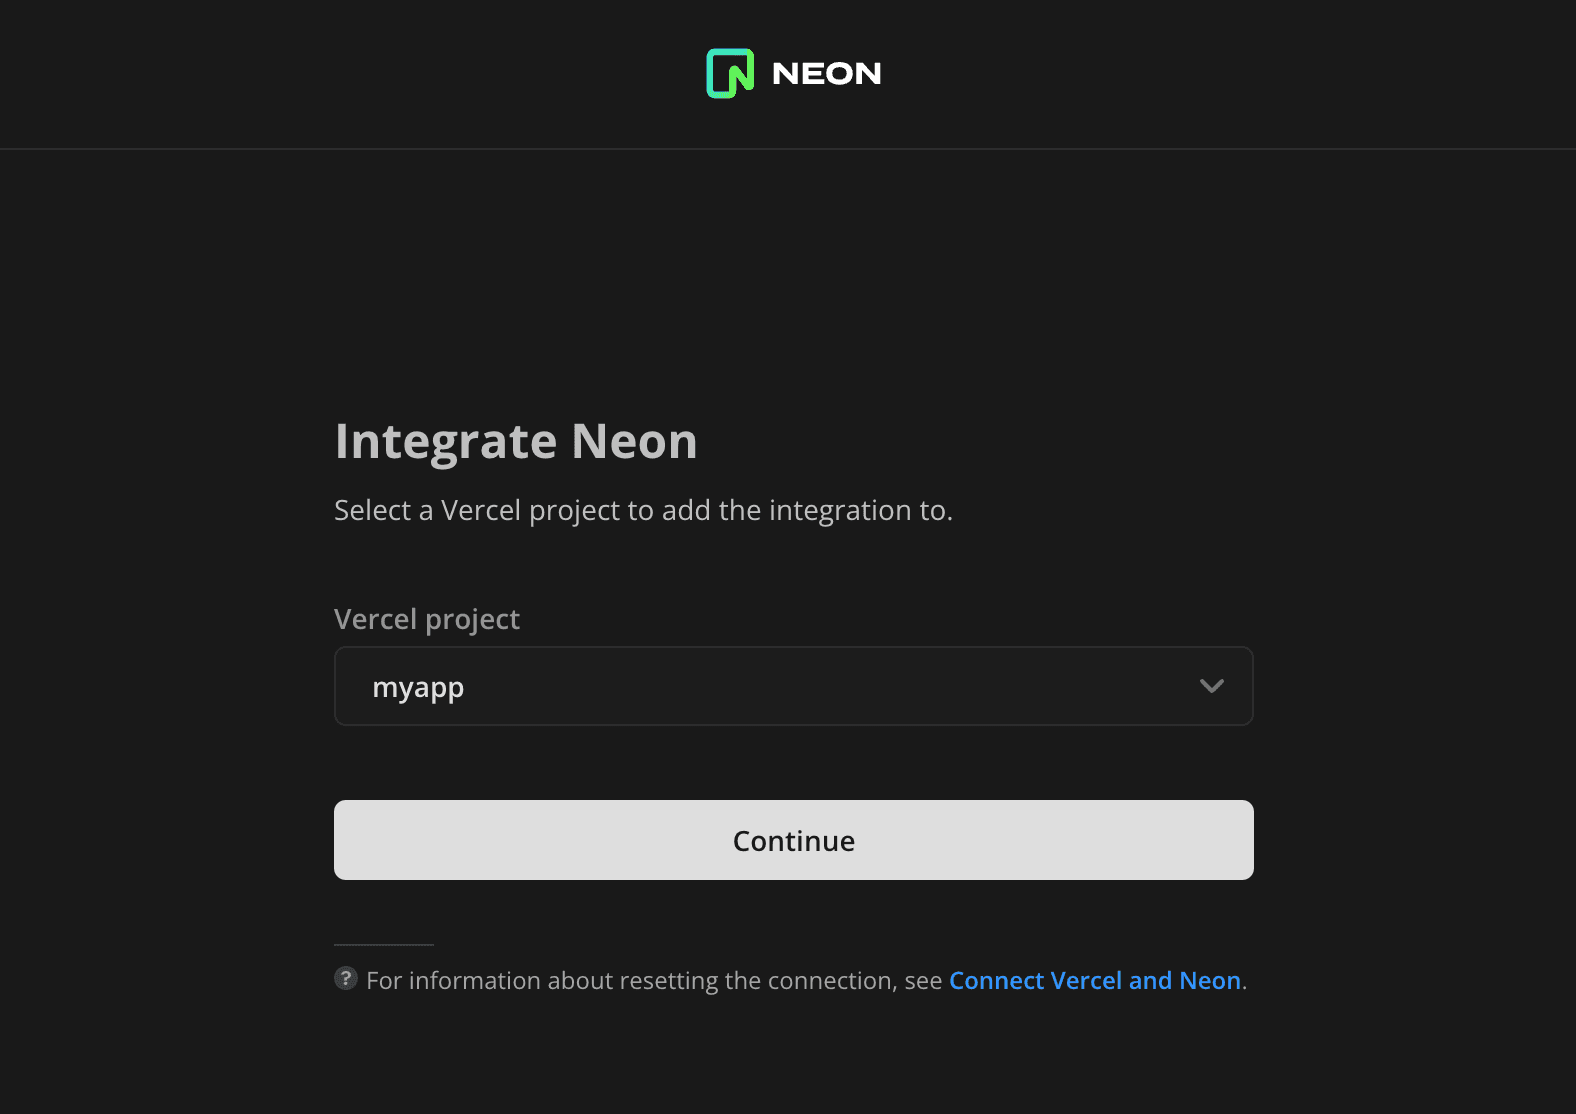
- Select the Neon project that you want to connect to your Vercel project by selecting the Neon project, database, and role that Vercel will use to connect.
note
The integration is dependent on the selected Postgres role. Removing it would cause the integration to stop functioning. If you need to change the role used by the integration in the future, see Change the database and role for preview branches.
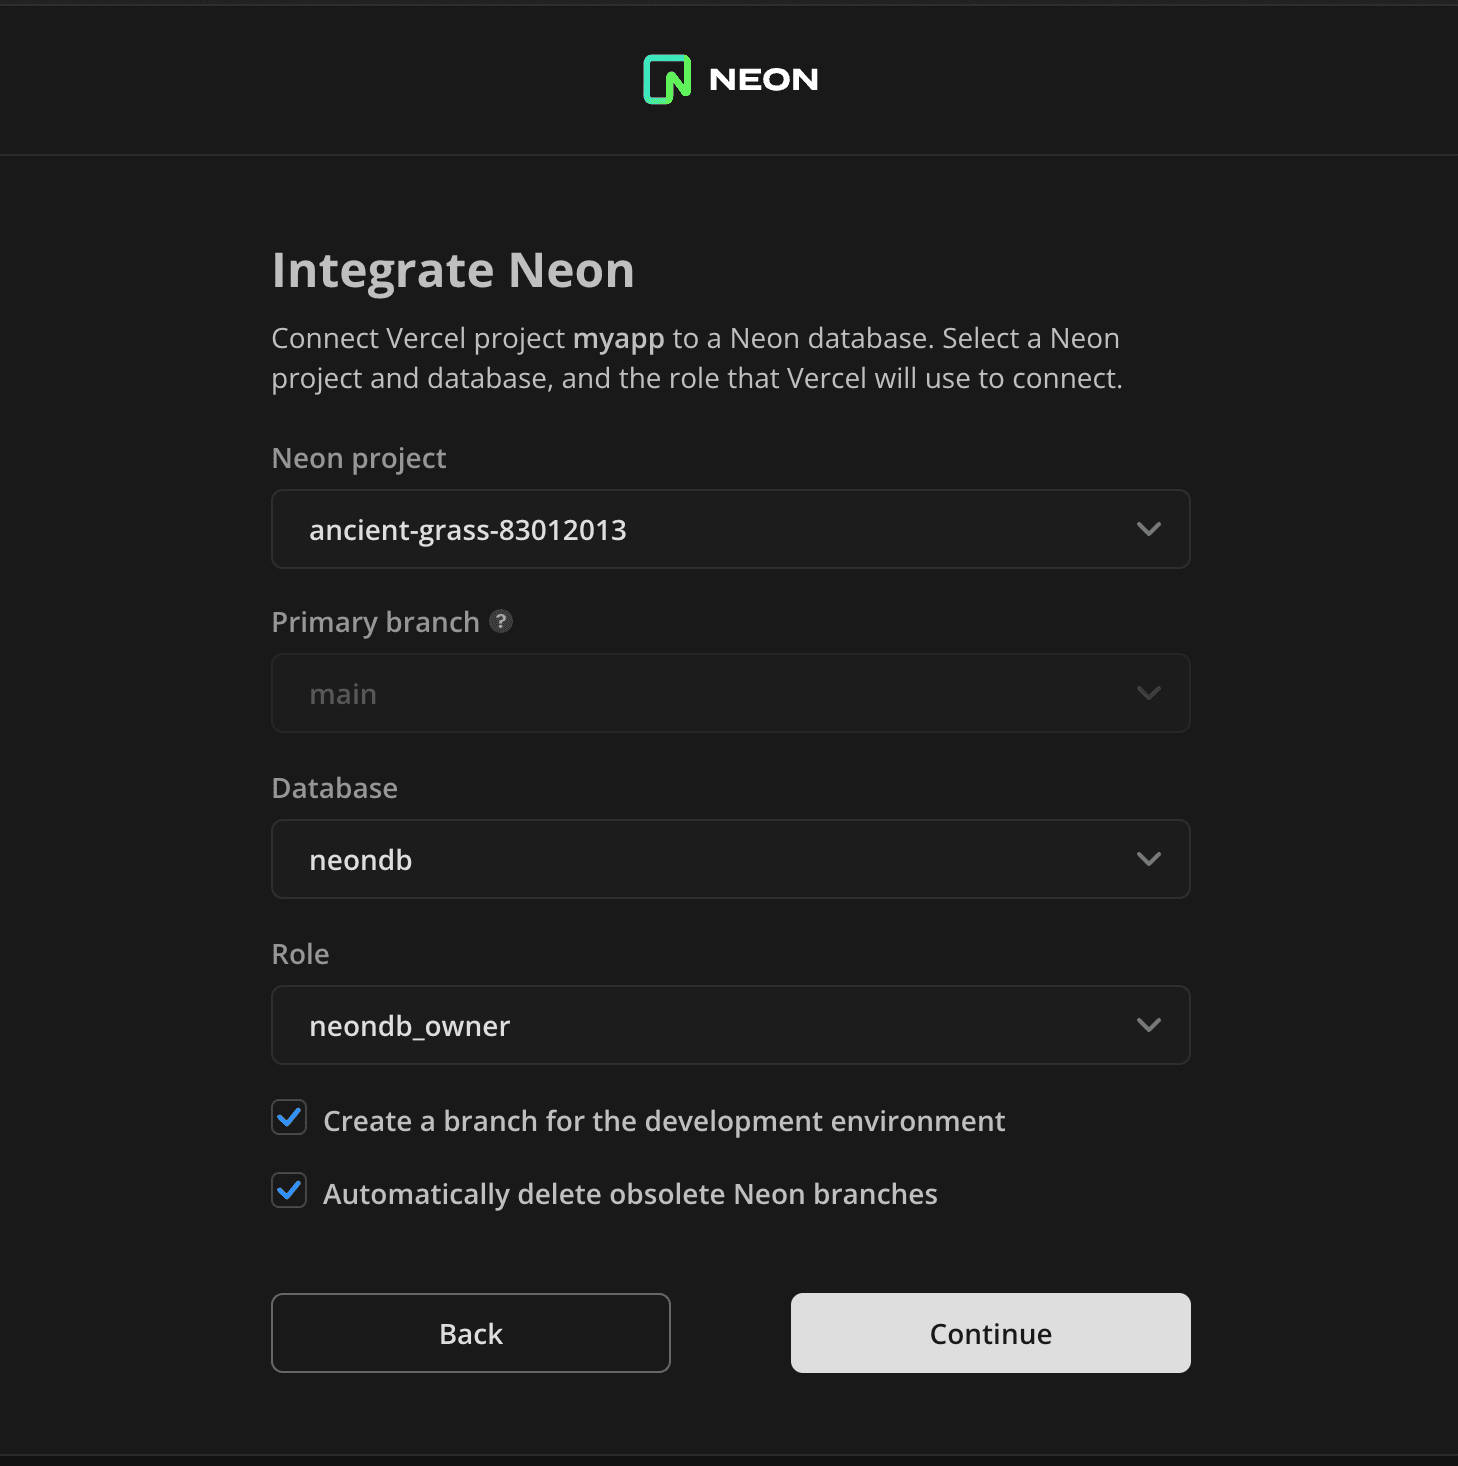
The Create a branch for your development environment option creates a branch named
vercel-devand sets Vercel development environment variables for it. Thevercel-devbranch is a clone of your project's default branch (main) that you can modify without affecting data on your default branch.With Automatically delete obsolete Neon branches enabled, Neon preview branches will be deleted whenever the git branch that triggered its creation is merged or deleted.
note
Branches created for preview deployments are created from the default branch of your Neon project. Earlier versions of the integration created branches from the initial root branch of your Neon project, which is designated as the default branch by default. Neon lets you change the default branch. If you have an older version of the integration that creates branches from your project's root branch, and you want branches created from your default branch instead, you can upgrade your integration by reinstalling it from the Vercel Marketplace.
When you finish making selections, click Continue.
-
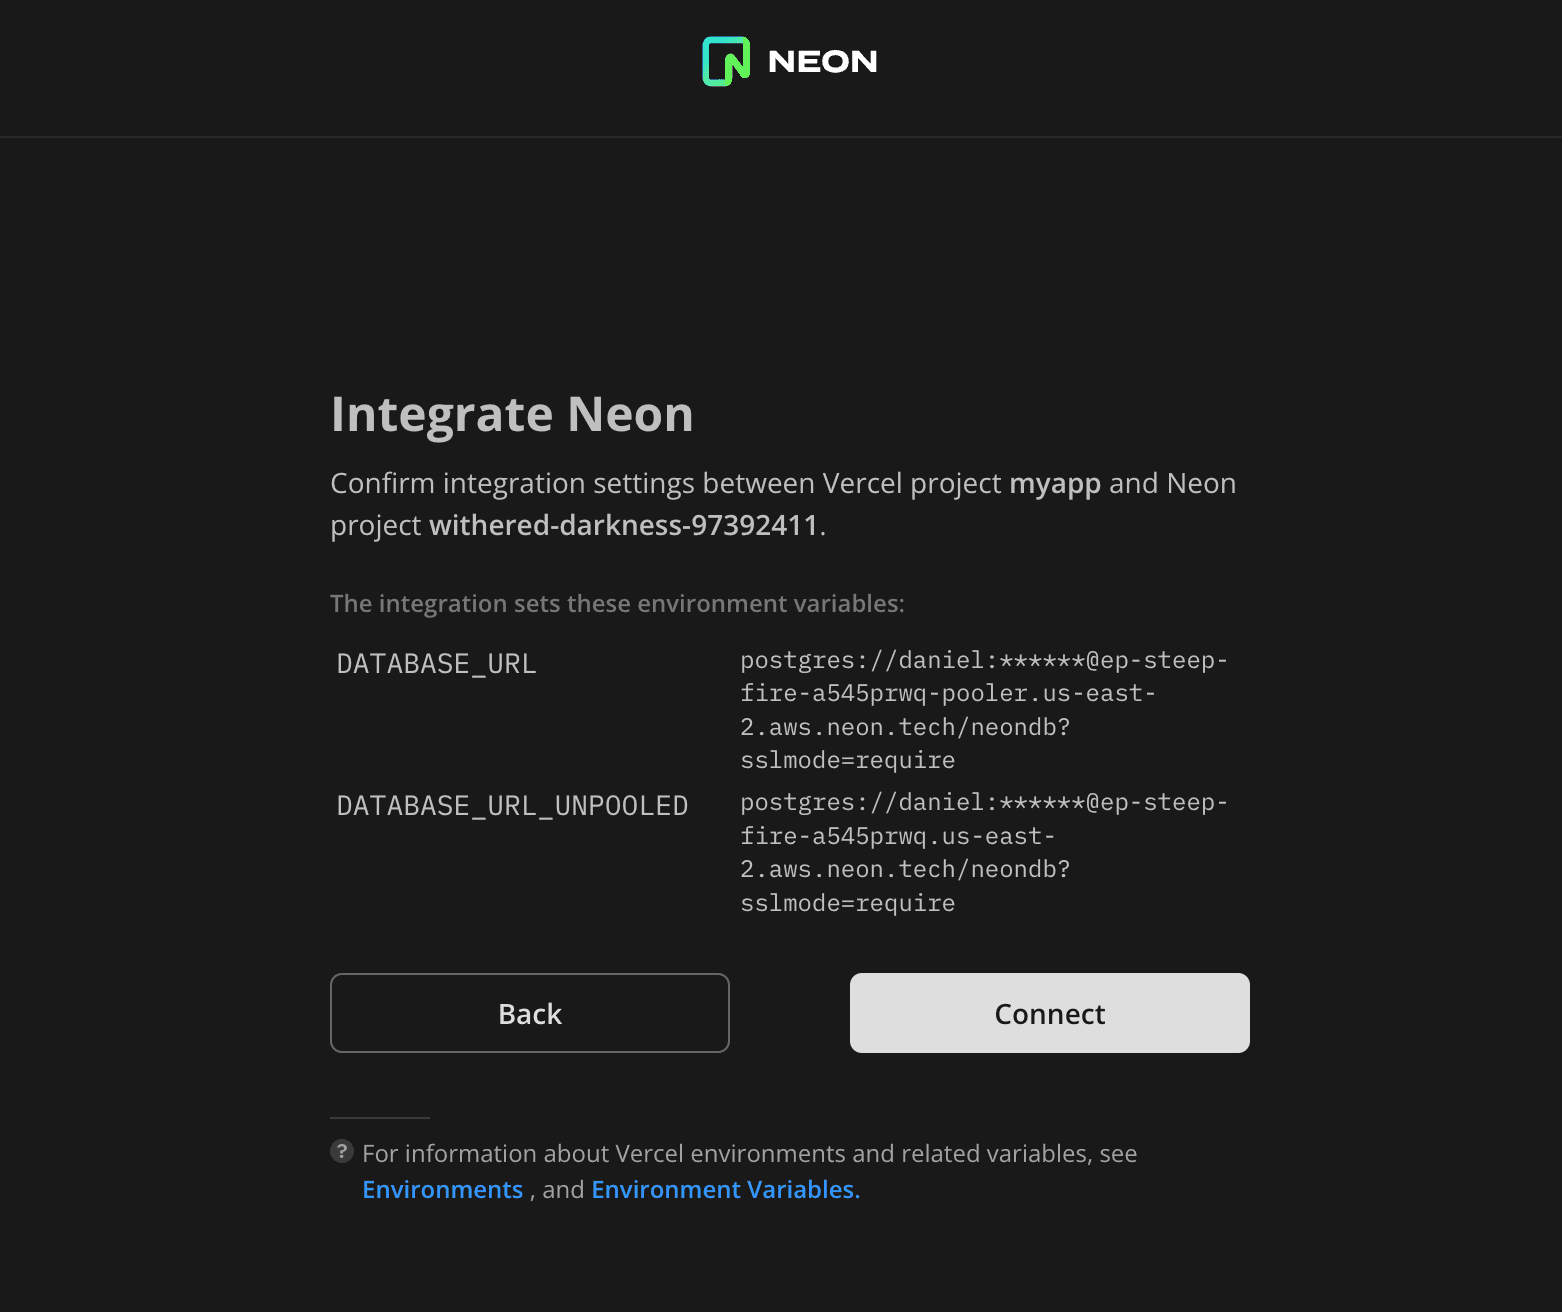
Confirm the integration settings. This allows the integration to:
- Set environment variables for your Vercel project's production, development, and preview environments.
- Create database branches for preview deployments.
- Create a development branch for your Vercel development environment.
-
Click Connect to confirm and proceed with the integration. If you encounter a connection error, see Troubleshoot connection issues.
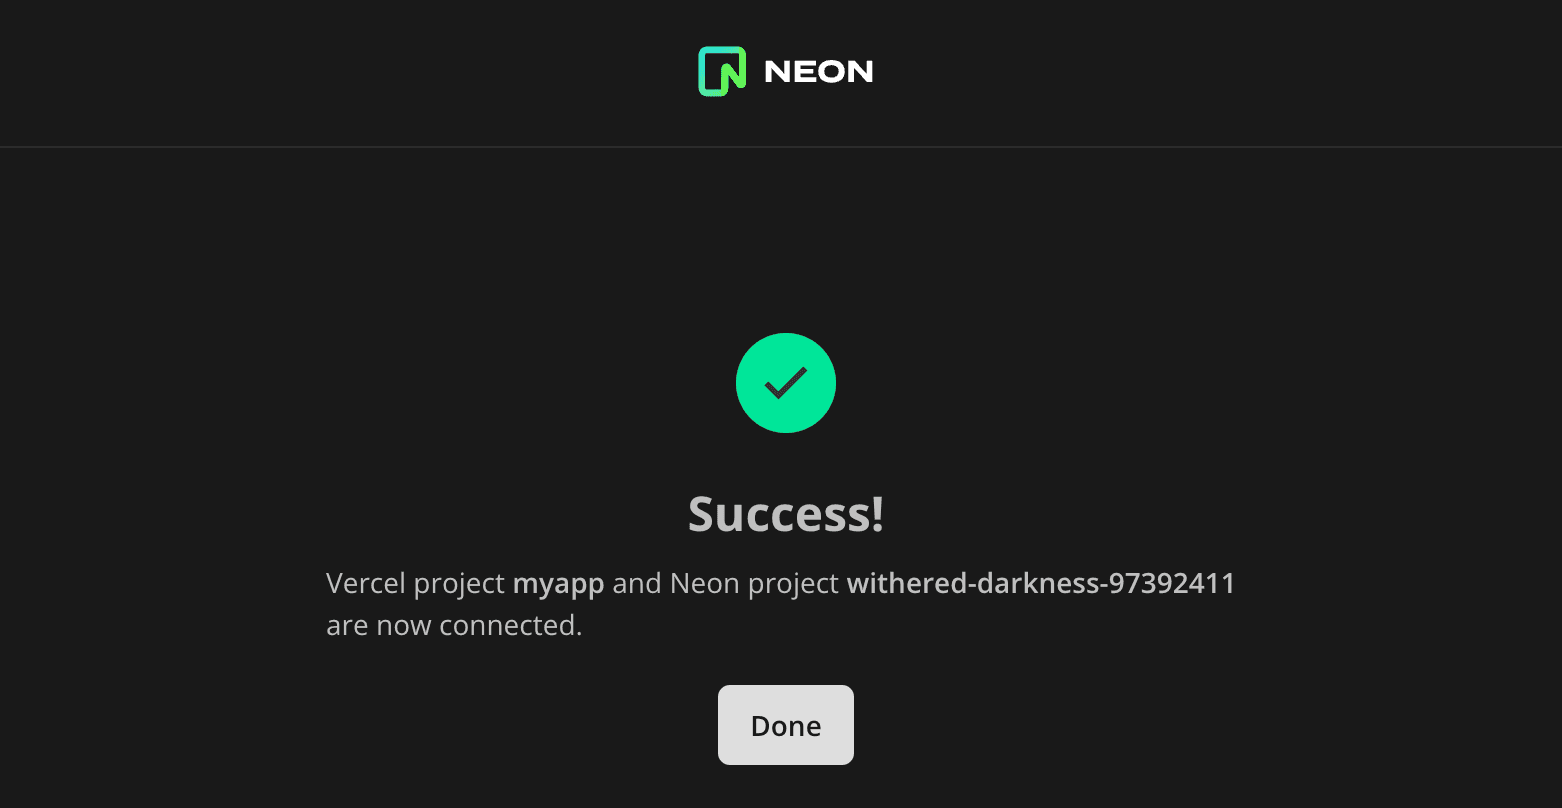
After the settings are configured, you are presented with a Success dialog.
-
Click Done to complete the installation.
- Select a Vercel project.
-
To view the results of the integration in Neon:
- Navigate to the Neon Console.
- Select the project you are connected to.
- Select Branches.
You will see the default branch of your project (
main). If you created a development branch, you will also see avercel-devbranch.
-
To view the results of the integration in Vercel:
- Navigate to Vercel.
- Select the Vercel project you added the integration to.
- Select Settings > Environment Variables.
You should see the
DATABASE_URLandDATABASE_URL_UNPOOLEDvariable settings added by the integration.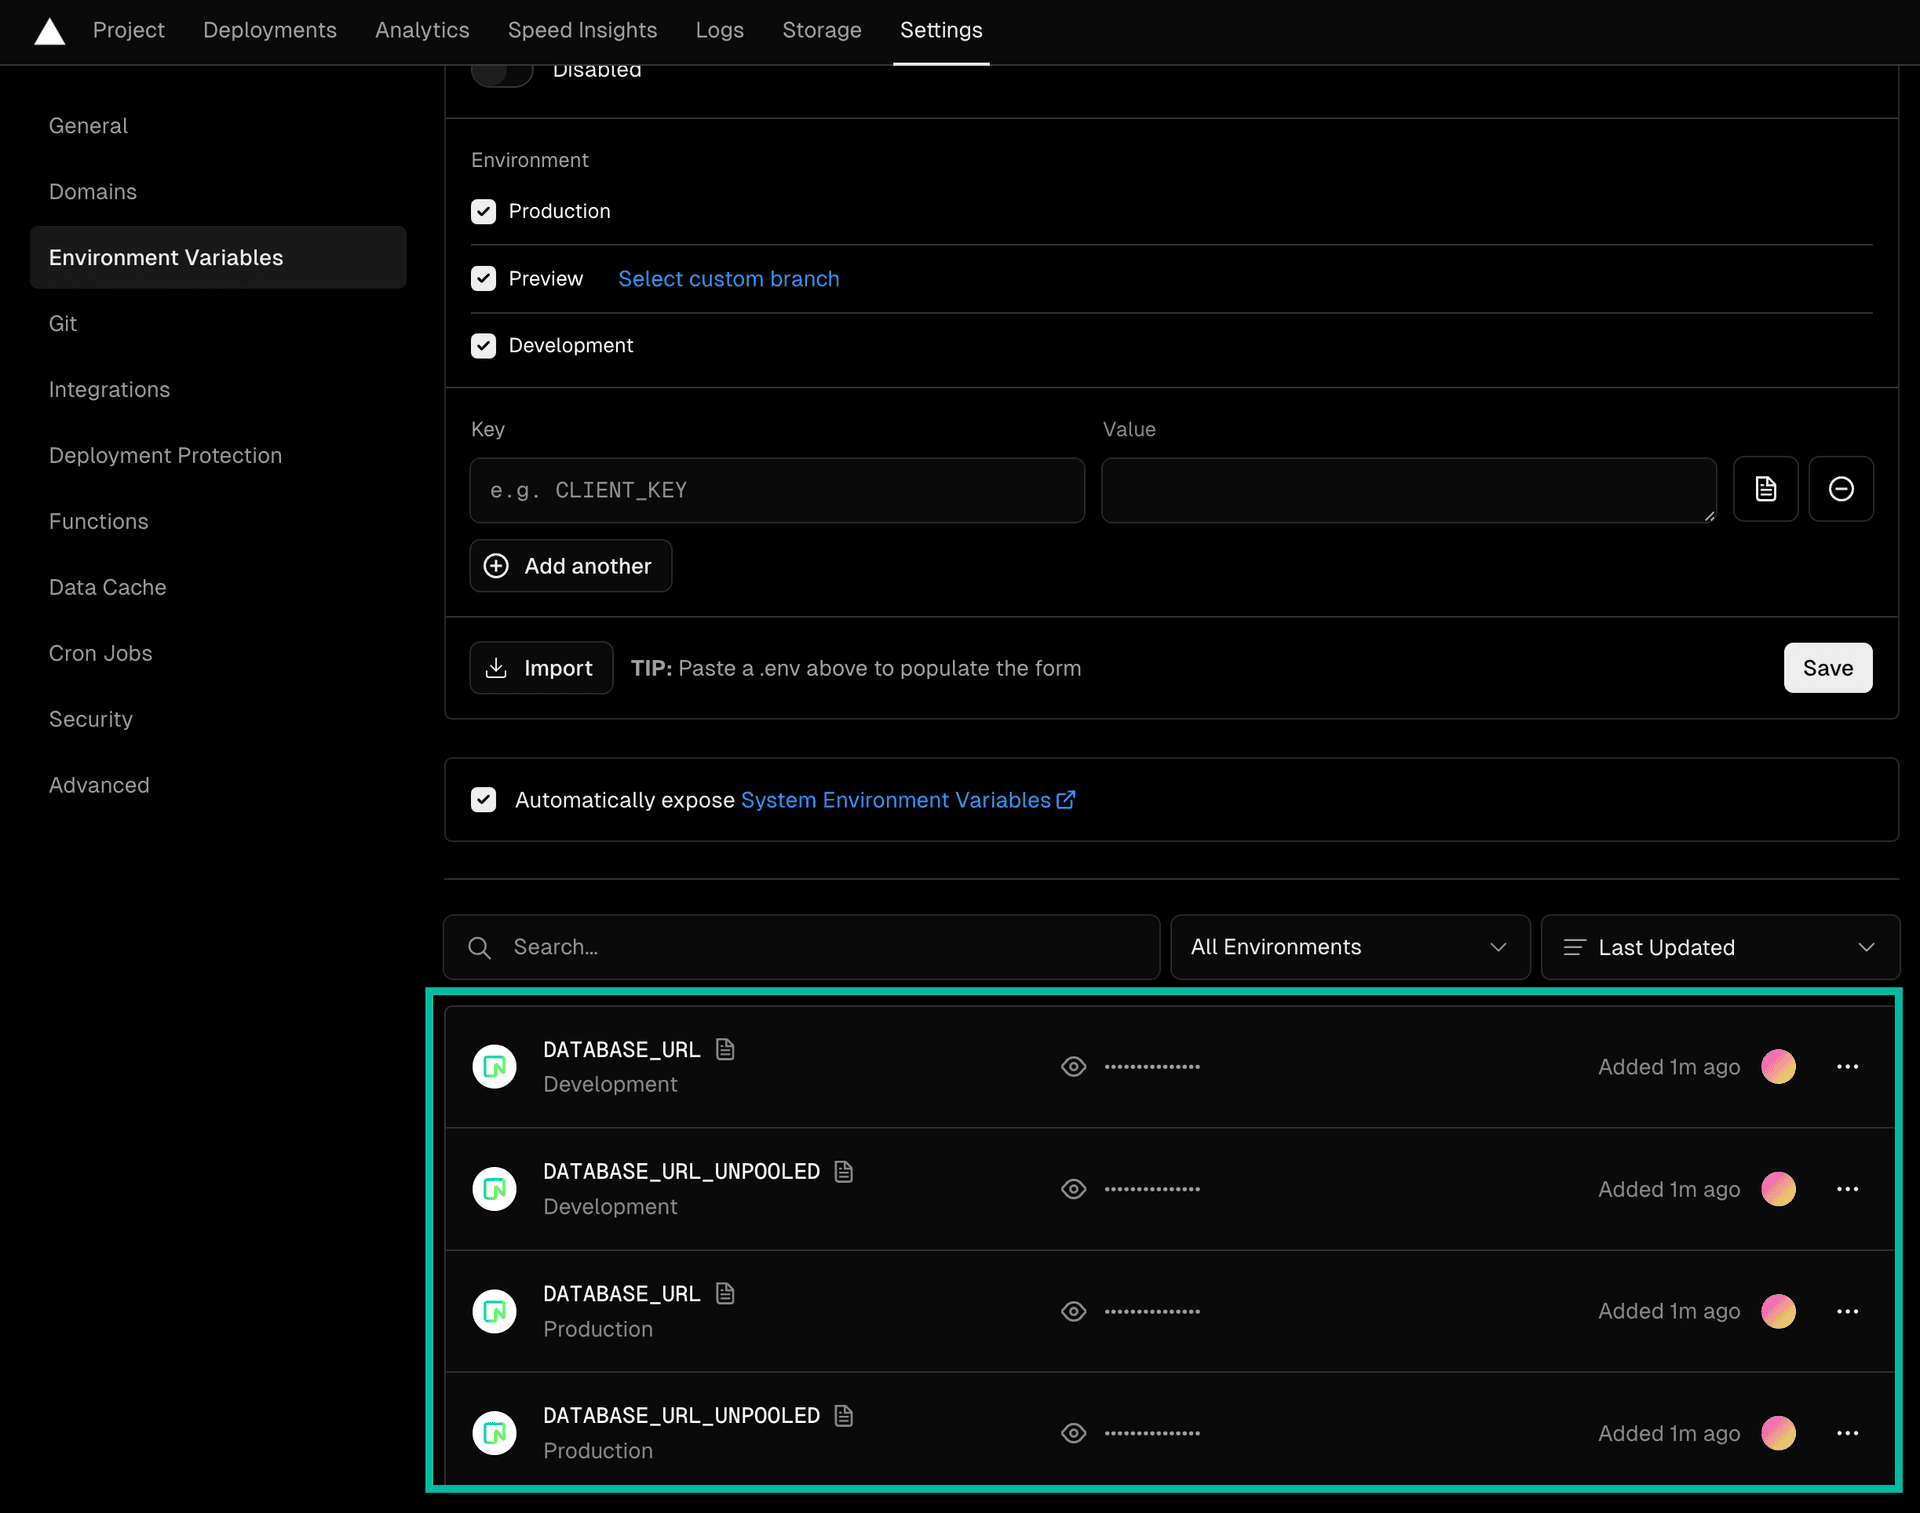
note
The
DATABASE_URLvariable set by the integration is set to a pooled Neon database connection string. TheDATABASE_URL_UNPOOLEDvariable is set to an unpooled connection string for tools or applications that require a direct connection to the database. For more information, see Manage Vercel environment variables.
Use the Neon Postgres Previews Integration
After you add the integration to a Vercel project, Neon creates a database branch for each preview deployment. The branch is created when you push commits made on your local branch to your application's source code repository. To see the integration in action, follow these steps:
-
Create a branch in your local source code repository.
cd myapp git checkout -b patch-1 -
Make changes to your application on the local branch.
-
Commit the changes. For example:
git commit -a -m "Update my app" -
Push your commit to the remote repository:
git pushPushing the commit triggers the following actions:
- The commit triggers a preview deployment in Vercel, as would occur without the Neon integration.

- The integration creates a branch in Neon. This branch is an isolated copy-on-write clone of your default branch, with its own dedicated compute. The branch is created with the same name as your
gitbranch but includes apreview/prefix.
- The integration sets Vercel preview environment variables to connect the preview deployment to the new branch.
- The commit triggers a preview deployment in Vercel, as would occur without the Neon integration.
Manage branches created by the integration
The Neon Postgres Previews Integration creates a branch for each preview deployment. To avoid using up your storage allowances or hitting branch limits, you should delete branches that are no longer required. Different options are supported for branch deletion.
Automatic deletion
The integration supports automatic deletion of obsolete preview branches when the corresponding Git branch is merged or deleted. If you did not select the Automatically delete obsolete Neon branches option when installing the integration, you can do so from the Branches tab the Vercel integration drawer.
- In the Neon Console, select your project.
- Select the Integrations page.
- Find the Vercel integration under the Manage heading, and click Manage.
- In the Vercel integration drawer, select the Branches tab.
- Check Automatically delete obsolete Neon branches.
When a branch is deleted, environment variables associated with the deleted branch are also removed from your Vercel project.
note
Avoid creating child branches on automatically created preview branches. The presence of a child branch will prevent the parent preview branch from being automatically deleted. In Neon, child branches must be deleted before the parent branch can be deleted.
Avoid manually renaming branches when using automatic branch deletion
The integration determines whether a preview branch created in Neon is obsolete by looking at its name and asking Vercel if a Git branch with the same exists.
- If either the Neon branch or Git branch is renamed, the name matching logic no longer functions as intended.
- If a Neon branch no longer has a matching Git branch, the Neon branch will be considered obsolete.
- If a Neon branch is considered obsolete, it will be deleted if automatic branch deletion is enabled.
In effect, renaming a preview branch in Neon or the corresponding Git branch can result in deletion of the preview branch in Neon and the loss of data on that branch.
The integration will never automatically remove a branch named vercel-dev. This is the name of the optional development branch created in your Neon project when you first install the integration. See Add the Vercel integration for information about this branch.
Manual deletion from the Vercel integration drawer
To remove branches created by the integration manually:
- In the Neon Console, select your project.
- Select the Integrations page.
- Find the Vercel integration under the Manage heading, and click Manage.
- In the Vercel integration drawer, select the Branches tab.
- Remove individual preview branches by clicking on the delete icon, or select Delete all to remove all preview branches.
Manual deletion via the Neon Console, CLI, or API
To remove branches from your Neon project using the Console, CLI, or API, see Delete a branch.
note
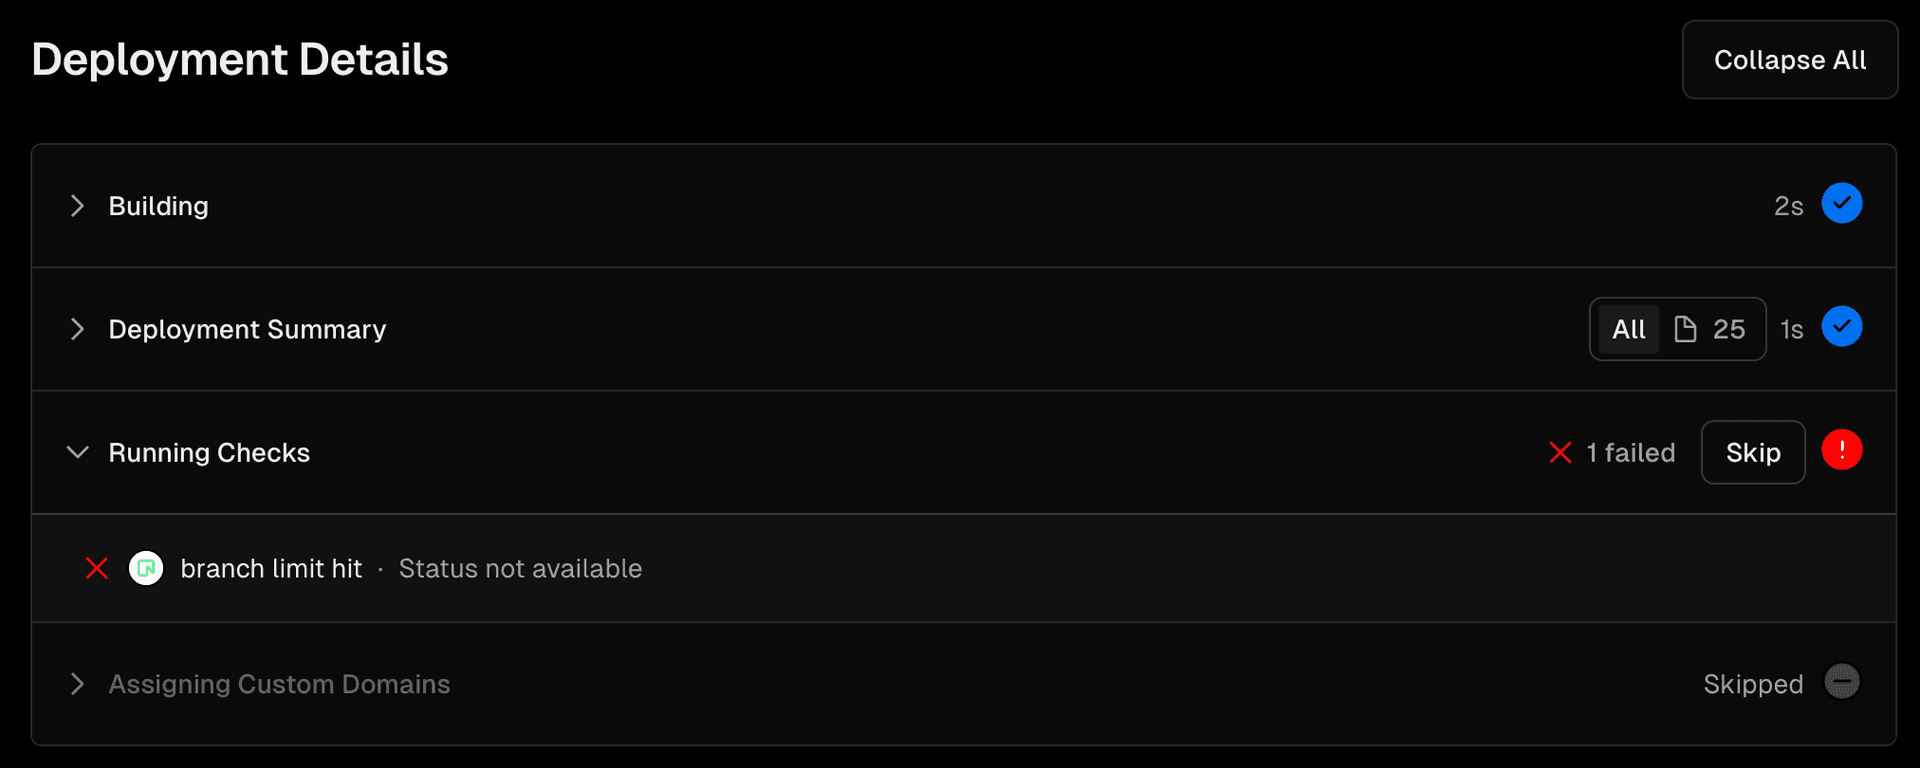
The latest version of the Neon integration displays a message on the Deployment Details page in Vercel under Running checks if you exceed the branch limit for your Neon project.
Manage integration settings
You can manage Vercel environment variables as well as the default database and role used by the integration from the Neon Console.
Configure environment variables
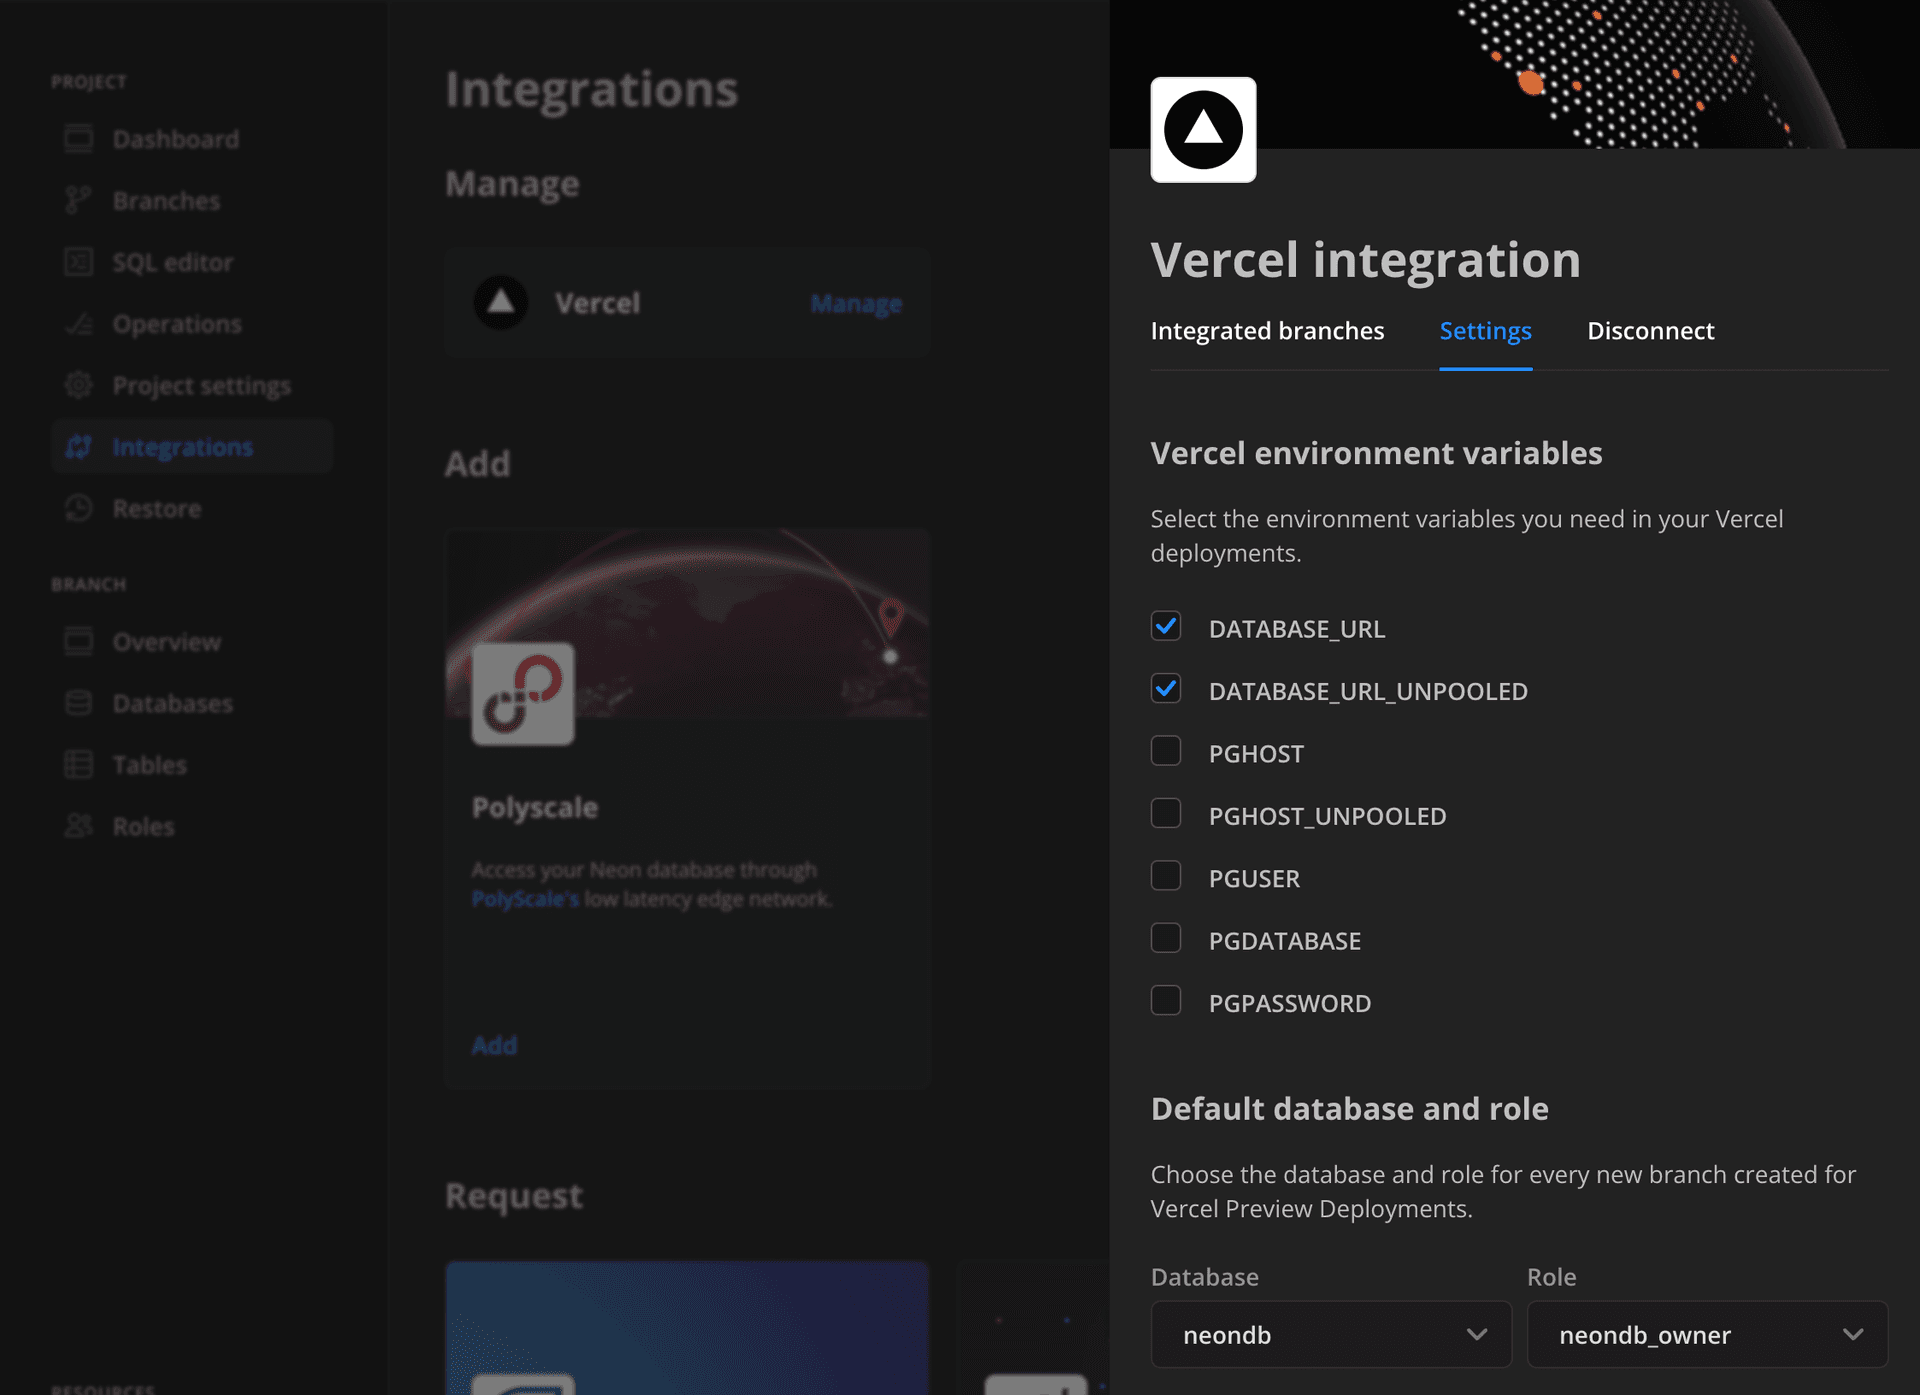
The Neon Postgres Previews Integration automatically sets the environment variables DATABASE_URL (pooled connection) and DATABASE_URL_UNPOOLED (direct connection) for your Vercel Production and Development environments. See Connection pooling for more information. When you create a preview deployment, the integration also sets these same variables for the Vercel Preview environment. If you want to define your database connection using different Postgres environment variables, the integration also supports the following:
PGHOST(set to a pooled Neon database connection string)PGHOST_UNPOOLED(set to a direct Neon database connection string)PGUSERPGDATABASEPGPASSWORD
You can choose the variables you want to use from the Neon Console:
- In the Neon Console, select your project.
- Select the Integrations page.
- Find the Vercel integration under the Manage heading, and click Manage.
- In the Vercel integration drawer, select the Settings tab.
- Select the environment variables you need.
- Click Save changes. Your variable selection is saved to your Vercel project and will be applied on your next deployment. Existing variables of the same name in Vercel will be overwritten. Viewing your new variable selection in Vercel may require refreshing your project's Environment Variables page.
Notes
- Clicking Redeploy in Vercel does not apply variable changes made in Neon to your Vercel project. This only occurs with your next deployment.
- The integration appends the
sslmode=requireoption to all Neon connection strings.
Change the database and role for preview branches
When you install the integration, you select a database and role for your Neon project. These details are used to define the database connection details in the Vercel environment variables mentioned above. From the Vercel integration drawer in the Neon Console, you can choose a different database and role for new preview deployment branches.
To change the database and role for new preview deployment branches:
- In the Neon Console, select your project.
- Select the Integrations page.
- Find the Vercel integration under the Manage heading, and click Manage.
- In the Vercel integration drawer, select the Settings tab.
- Under Default database and role, select a new Database and Role.
Your change will be reflected in your Vercel Preview environment variables on the next preview deployment.
Disconnect the integration
If you want to disconnect the Neon Postgres Previews Integration from your Vercel project, you can do so from the Neon Console. Disconnecting stops the integration from creating preview branches and setting environment variables for those branches in Vercel. It does not remove the integration from your Vercel project. To fully remove the integration from your Vercel project, you must do so in Vercel. See Manage the Neon Postgres integration in Vercel for instructions.
To disconnect the Neon integration from your Vercel project:
- In the Neon Console, select your project.
- Select the Integrations page.
- Find the Vercel integration under the Manage heading, and click Manage.
- In the Vercel integration drawer, select the Disconnect tab.
- Click Disconnect.
Make the integration available to other Vercel projects
If you added the Neon Postgres Previews Integration to a single Vercel project but would like to make it available for use with your other Vercel projects, complete the steps outlined below.
important
The Neon Postgres Previews Integration can be used with more than one Vercel project, but it can only connect one Vercel project to one Neon project. It does not support connecting multiple Vercel projects to one Neon project or connecting multiple Neon projects to one Vercel project. The steps below outline how to make the integration available to other Vercel projects to use with their own separate and dedicated Neon project.
- Make sure the Neon Postgres Previews Integration that you added previously has access to the Vercel project that you want to use with the Neon Postgres Previews Integration.
- On the Vercel Dashboard, select Integrations.
- Find the Neon Postgres integration, and select Manage.
- On the Neon Postgres integration page, select Manage Access.
- On the Manage Access for Neon Postgres modal, make sure that the Neon Postgres integration has access to the Vercel project. You can do so by selecting Specific Projects and choosing a Vercel project or by granting access to All Projects. If you previously granted access to All Projects, no change is necessary.
- Click Save.
- Navigate to this URL: https://vercel.com/integrations/neon/new.
- Follow the prompts. When you reach the Integrate Neon dialog, select the Vercel project you want to add the integration to. Vercel projects that are already integrated with Neon are identified as
CONNECTED.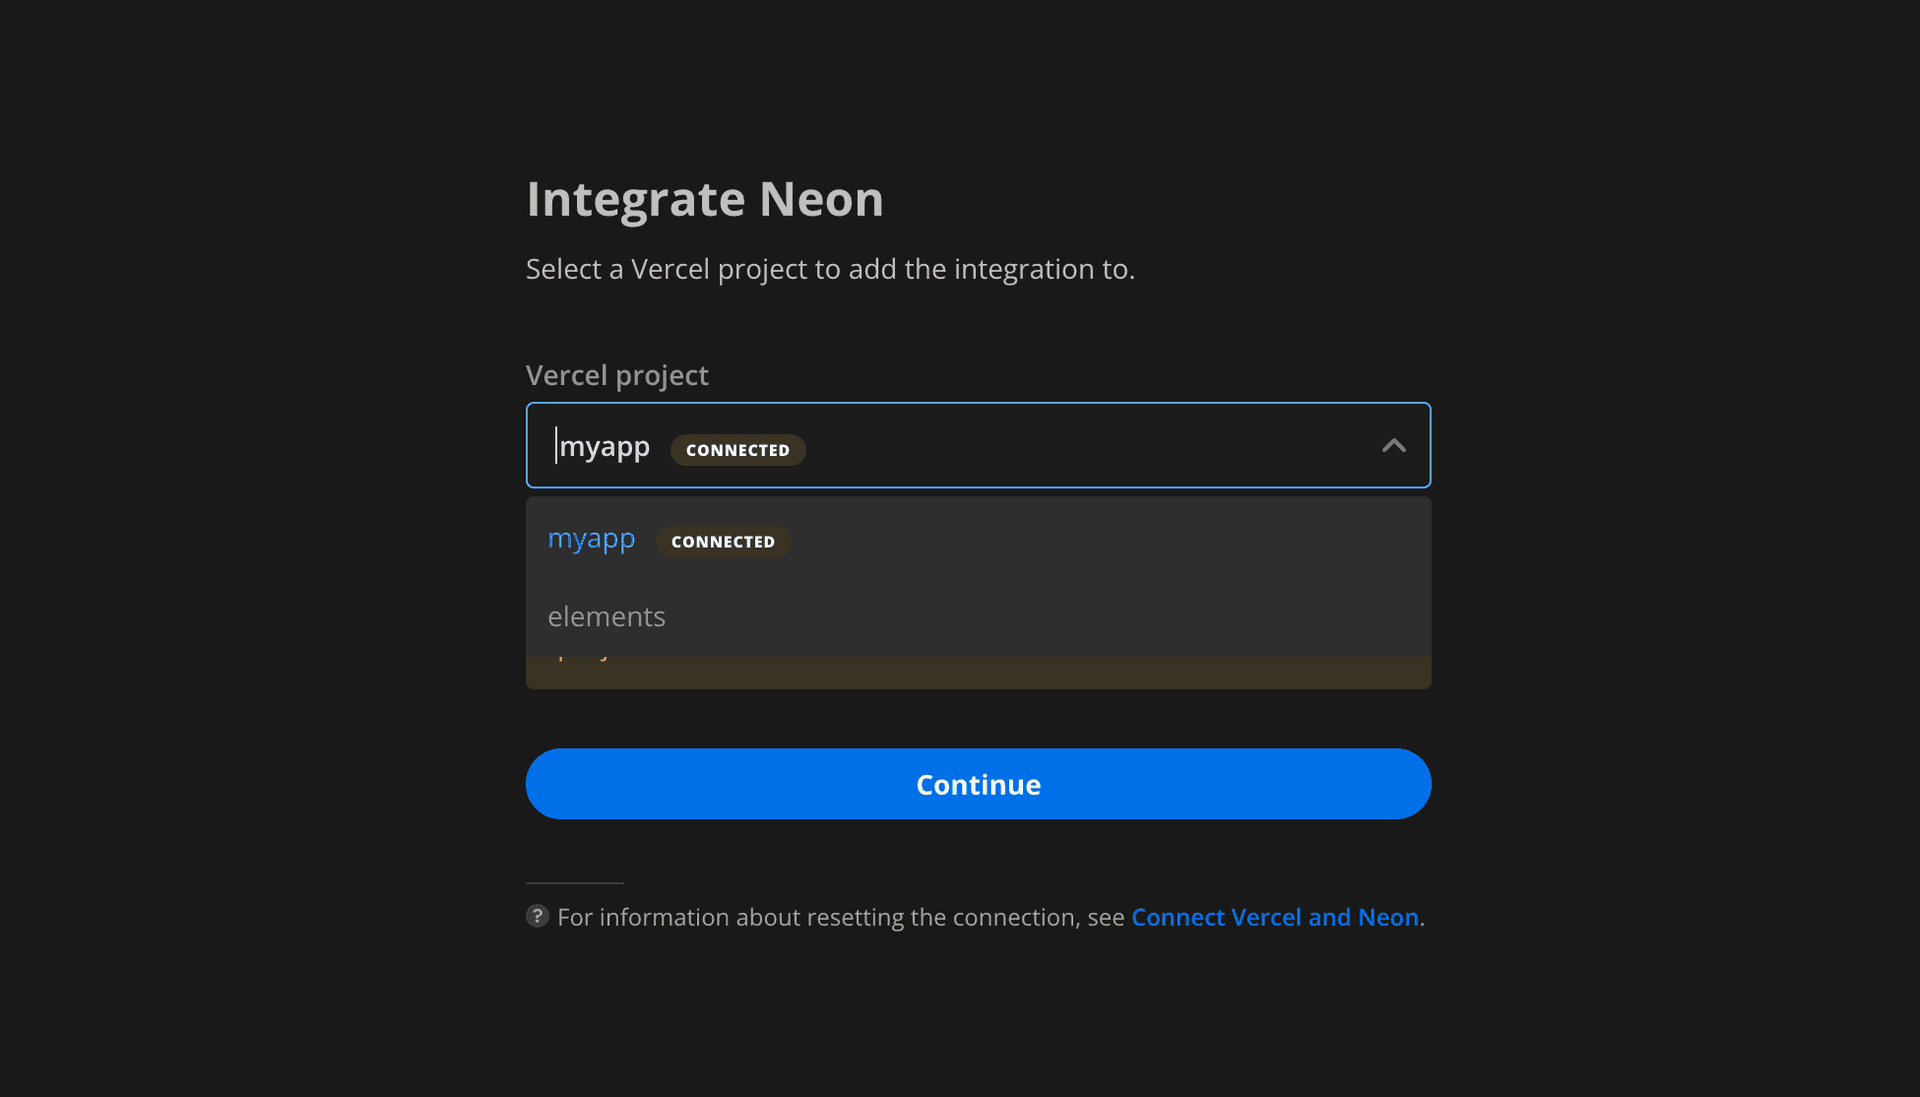
- Continue following the prompts to complete the setup. These are the same steps described above, in Add the Neon integration. When you select a Neon project to connect to, make sure to select one that is not already connected to a Vercel project, as you cannot connect a Vercel project to multiple Neon projects or vice versa.
Manage the integration in Vercel
To view permissions, manage which Vercel projects your integration has access to, or uninstall the Neon integration from Vercel:
-
On the Vercel dashboard, select Settings > Integrations.
-
Find the Neon integration and select Configure.
note
Removing the Neon Postgres Previews Integration removes the Vercel environment variables set by the integration. It does not remove Neon branches created by the integration. To remove Neon branches, see Delete a branch.
Troubleshoot connection issues
This section describes commonly encountered connection issues for the Neon Postgres Previews Integration.
Failed to set environment variables
If the environment variables configured by the Neon integration already exist, you may encounter the following error due to an existing integration that sets one or more of the same environment variables.
Failed to set environment variables in Vercel. Please make sure that the following environment variables are not set: PGHOST, PGUSER, PGDATABASE, PGPASSWORD, DATABASE_URLIn this case, you can remove or rename the existing environment variables in your Vercel project settings and retry the Neon integration.
-
From the Vercel project page, select Settings.
-
Locate the environment variables required by the Neon integration and remove or rename them.
note
Alternatively, you can remove the conflicting integration, assuming it is no longer required. This may be a previous Neon integration or another integration. Removing the integration removes the variables set by the integration.
-
Try adding the integration again. See Add the Neon Postgres Previews Integration.
DATABASE_URL not set on first preview deployment
In earlier versions of the integration, the preview environment DATABASE_URL is not set by the Neon Postgres Previews Integration on the first preview deployment after adding the integration to a Vercel project.
To avoid this issue, you can reinstall the integration to update to the latest version. Alternatively, a workaround is to redeploy your preview deployment in Vercel. The preview environment DATABASE_URL is set on the next deployment. For redeploy instructions, see Managing Deployments, in the Vercel documentation.
Stored passwords missing in the selected Neon project
Neon projects created after March, 2023 store role passwords in a secure storage vault associated with the project, allowing passwords to be retrieved by the Neon Postgres Previews Integration for the purpose of setting Postgres connection environment variables in Vercel. Projects created before March 2023, do not store role passwords, and are therefore not compatible with the Neon Postgres Previews Integration. The current workaround for this issue is to migrate your data to a new Neon project. See Import data from another Neon project.
The integration stops working after removing Postgres roles in Neon
The integration is dependent on the Postgres role you specify when installing the integration. Removing this role will cause the integration to stop creating preview deployment branches. If you need to change the role used by the integration, see Change the database and role for preview branches.
Video: A Postgres database for Every Preview Deployment
Watch this video from the Neon DevRel team for an overview of the Neon Postgres Previews Integration.
note
If you have an existing CI pipeline, this blog post shows how to build the same developer workflow using GitHub Actions and the Vercel CLI: A database for every preview environment using Neon, GitHub Actions, and Vercel.
Need help?
Join our Discord Server to ask questions or see what others are doing with Neon. Users on paid plans can open a support ticket from the console. For more details, see Getting Support.